
 One of the biggest challenges when working in a studio, is that you’re essentially shooting in a plain rectangular box. When photographing portraits, the two obvious ways out of that is to create an interesting (or complementary) background, and then to create interesting (or flattering) lighting.
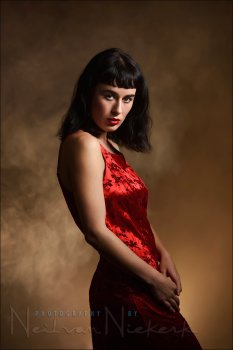
The lighting itself need not be complex. For this series of portraits of Olive, I used the gridded 1′ x 6′ softbox. By swinging it horizontally or vertically (or diagonally), I can change the way the light falls on my subject and the background. This article on Chiaroscuro lighting is a good example. So with these portraits of Olive, I could easily control the light fall-off on her body with the tall gridded stripbox. (Btw, check out Olive’s page. She’s a delight to work with.)
The main light on her was an easy fix this time. Now the background – I wanted to change the colors up to complement her clothing she’d change in. Instead of changing the rolls of paper-backdrop, it was much easier to light the background with a flash and colored gels. For this I used the MagMod2 basic kit ( / ). To gel a flash there are numerous options, but I doubt any are as easy and quick to change as the Magmod setup – magnets clip the gel holder into place.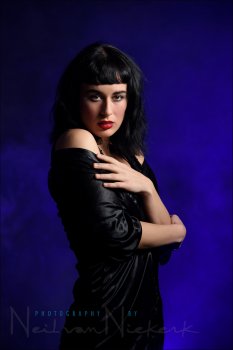 Super-easy to place on the flash, and just as easy to take it off again. Magnets! I mentioned these in the recent post – Best & worst photography purchases of 2015.
The pull-back shot (shown further down) will show the mottled muslin backdrop that I used. The gels didn’t really add much light to the backdrop itself – the backdrop was there to help create a background that has some kind of texture.
To hold the color of the background gels, we used a Fog Machine ( / . It is inexpensive and fun to use. In the pullback shot you can see the remote cable for the smog machine on the floor – Olive would press this with a toe to release the fog while I was shooting a sequence. She’s quite versatile as a model! The fog then created the dreamy texture, and showed the color of the gelled flash.
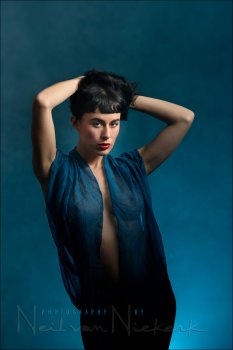 All of this added up to different backgrounds. The fog gave a non-static background from image to image, and the gels would give different colors with different sequences.
Lighting setup
For this pull-back shot, I used the studio’s room lighting to show how the different elements were placed.
On the left, the gridded Profoto RFi 1’×6’ softbox (affiliate), as the main light. I could swing and rotate this as I needed. The light-stand is on caster wheels, so it was easy to its position a bit.
The Fog Machine (affiliate) is on the right, placed on the step-ladder. The fog would blow into the area behind Olive, towards the background flash. The flash on the floor in the background, had the MagMod gels (affiliate), and was pointed up towards Olive.
YOU MIGHT ALSO LIKE


Share this Post
latest post
-
-
-
 History of advertising Photography October 10, 2016
 -
 Materials for pinhole camera October 7, 2016
 -
 Photojournalism photographers October 4, 2016
 -
 35mm nitrate film October 1, 2016
 -
 Photographic films September 28, 2016
 -
 One Colour Photographs September 25, 2016
 -
 Best compact digital camera for street photography September 22, 2016