 This post comes from our former web studio intern, !
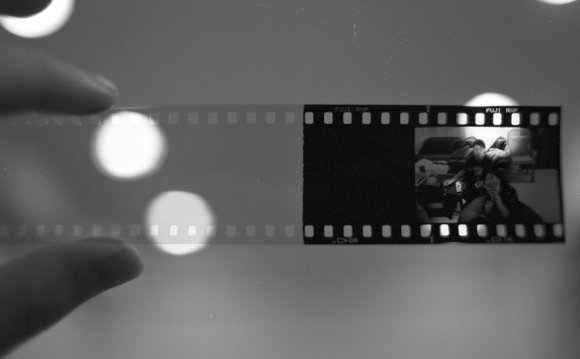
Being a film photographer, I am on an endless search for inspiration and new ways to experiment with film.
Just over a year ago, I became so mesmerized by the magical worlds photographers like Bridgette Bloom were creating by soaking film, that I just had to delve into it myself. Film soaking highlights the aspects of film photography that I love most – the happy accidents of light leaks or unintentional double exposures, the importance of letting go of what you cannot control, and the mystery of not knowing exactly what you captured on film until you get it developed. You simply cannot know exactly how wine or vinegar or salt water will affect a specific roll of film on a certain day over a given period of time – and there is such beauty in embracing that unknowability, in allowing yourself to let go of expectations, and just have fun.
While film soaking is far from an exact science, there are tons of tips and tricks that I have developed over the past year that will make experimenting with film soaking much easier for those of you that are inspired to give it a try. Although these are the steps that I personally follow when soaking film, each photographer has their own method and you should feel free to be creative and do whatever works best for you.
 Materials:
35mm film canister
35mm camera
Jar or container
Red wine (or something else to soak with)
Dry rice (optional)
Step 1: Choosing a film
Because of how experimental film soaking is, I recommend that you use an inexpensive color negative film. Soaking will still have an effect on black and white film, but one of my favorite parts of film soaking are the unexpected, often vibrant colors that appear. My go-to 35mm film for soaking is Fujifilm Superia X-TRA 400, which is inexpensive and widely available.
Step 2: Choose a soaking material
 Anything will have some type of an effect on your film, more acidic solutions tend to produce more drastic results. I know people that have used vinegar, detergent, bleach, salt water, and even hot tea to soak their film. My favorite experiments so far have been lime juice, tequila, and red wine. I have high hopes for a roll that I recently soaked for three days in a colorful bath bomb!
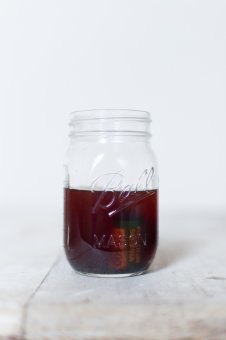
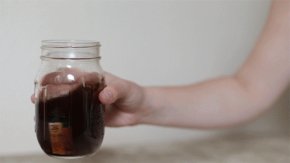
Step 3: Soak the film
Fully submerge the entire film canister in whatever you have chosen to soak it in, swirling every couple of hours to release any air bubbles. I tend to soak film for anywhere between 1-3 days. The longer you soak, the more dramatic the effects.
You can soak your film before or after you shoot the roll. However, I always soak it beforehand because the results tend to be amplified.
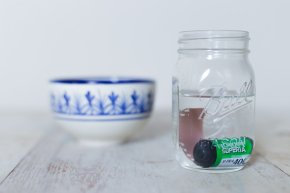
Step 4: Rinse the film (optional)
I always rinse out my film in water for 1-2 days after soaking, changing the water every couple of hours. This helps the film to be less sticky, making it easier to shoot, and it also gets rid of extra residue that can potentially cause issues in developing.
 Step 5: Dry the film (optional)
I also always dry my film thoroughly before shooting by placing it in dry rice for 1-2 days, and then letting it air dry for at least a week. This will prevent your camera from getting damaged by any water and also makes it much easier to advance the film while you are shooting.
Step 6: Advance the film (optional)
Even if you rinse out the film and let it dry thoroughly, soaked film can still be sticky. In order to avoid any issues advancing the film while I’m in the middle of a shoot, I advance through the roll ahead of time. If you have camera that you advance and rewind by hand, leave the lens cap on and advance the film to the end of the roll and then rewind. If you have a camera that automatically advances and rewinds film, you can take the film canister into a pitch black room (like a closet, bathroom, or basement), pull all of the film out of the canister, and then rewind it by hand. Be mindful to not expose the film to any light during this step and also be sure to leave enough film out of the canister after you rewind it so that it is easy to re-load into your camera.
Step 7: Take photos!
Step 8: Get the film developed
Developing your own soaked film is definitely ideal, however, most people get their film developed at professional labs or drugstores. Please keep in mind that depending on what you soaked your film in, there is potential for it to contaminate the chemicals used to develop film. Always let a lab know ahead of time that your film is soaked, that way they can accommodate and avoid accidentally damaging somebody else’s film that gets developed after yours. Labs at drugstores (Walgreens, CVS, etc) can sometimes be less strict and may be more likely to accept soaked film.
Remember, film soaking isn’t a flawless process, but that imperfection is what makes it so magical, so be sure to not get too fixated on end results and enjoy the journey!


YOU MIGHT ALSO LIKE


Share this Post
latest post
-
-
-
 History of advertising Photography October 10, 2016
 -
 Materials for pinhole camera October 7, 2016
 -
 Photojournalism photographers October 4, 2016
 -
 35mm nitrate film October 1, 2016
 -
 Photographic films September 28, 2016
 -
 One Colour Photographs September 25, 2016
 -
 Best compact digital camera for street photography September 22, 2016