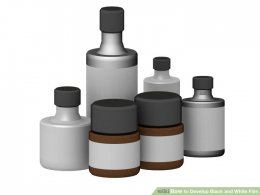
 Dilute the chemicals. Most photographic chemicals come in concentrate form, which needs to be mixed with water. You are going to use the graduated cylinder to measure the chemicals and water, and the gallon jugs to store them.
The Developer - 1:3 Chemical to water mix. That is, 1 part developer to 3 parts water. This gives you a "stock" solution. Fill one gallon jug with this stock solution. The stock solution will be diluted more before using it on the film. Diluting this stock solution will provide you with a "working" solution.
The Stop Bath - 1:63 Chemical to water mix. Mix the stop bath and water together and store in a gallon jug. This is a working solution.
The Fixer - 1:4 Chemical to water mix. Mix the fixer and water together and store in a gallon jug. This is also a working solution.
Hypo-Clearing Agent - Mix the full packet (4.4oz) with 1.25 gallons (4.7 L) of water. This chemical comes as a powder, and you need to ensure that it is thoroughly mixed. Store in a gallon jug.
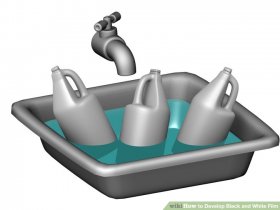
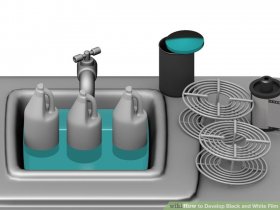
Once the chemicals have been mixed and stored in the gallon jugs, you need to bring them to the correct temperature. Fill a large sink (like your kitchen sink) with water that is 68 degrees Fahrenheit (20 degrees Celsius). Use the thermometer to get the correct temperature. This is very important. Now put your gallon jugs of chemicals in the sink, floating in the water. These chemicals must be 20 degrees Celsius when you use them. You are going to put them in 68 degrees water because the temperature of the water is going to drop a bit while bringing the chemicals to the correct temperature. Try to be as accurate as possible when it comes to the chemicals' temperature. More than 1 degree above or 1 degree below 20 degrees can have a big effect on the film! Remember, the final chemical temperature you want is 20 degrees, and you are soaking the chemicals in 68 degree water because the gallon jugs will sit in the water for at least 30 minutes, and the water temperature will drop a couple degrees during that time.
Place the tools out in front of you, possibly on a desk. You're going to be loading the film onto the reel in complete darkness, so make sure you lay the tools out in such a way that you can find them in the dark.
Turn off the lights. Use the bottle opener to pop the bottom off the film canister, which should be very easy. While only touching the film negative from the edges, pull the film out of the canister. The film will be taped to the center film spool. Make sure you cut it off right at the base of the spool or you'll be cutting through your pictures. Also cut the tip off the film (the odd shaped piece that sticks out of the canister when you first buy the film) so that it's flat. You only need to cut about 1 inch (2.5 cm) off the tip.
10
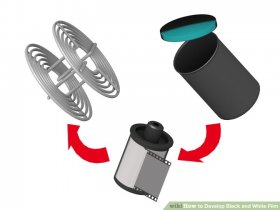
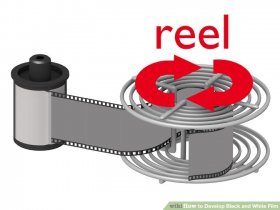
Spool the film onto the film reel. While not touching the surface of the negative, slide the negative into the opening of the reel. Slide about 4 inches (10.2 cm) of film into the reel. Start walking the film onto the reel by twisting one side of the reel back and forth. To be clear on this, keep your left hand steady, and with your right hand twist the right side of the reel forward, then bring it back. Continue doing this until all the film is loaded onto the reel. If your reel looks like the one in the image, it's not the auto-loading type, and you will need to trap the loose end of the film under the spring clip in the center, then fit the film into the space between the spiral wires as you rotate the reel. It's a lot easier to do than it sounds. Squeezing the film to make it slightly curved will help.
11
Place the reel inside the developing tank, and screw the lid onto the tank. The tank is now light-tight, and you can turn on the lights. Even though the developing tank has a hole in the top for pouring in the chemicals, it is in fact light-tight. Pour water into the tank, let stand for 1 minute, this is called pre-wetting and will make the film swell up and accept the developer solution. pour out the water
12
Bring the developing tank to the sink where you have the chemical jugs floating in water. Check the developer chemical with the thermometer. If it's at 20 degrees Celsius, then you are ready to go. If it is higher than 20 degrees, then keep checking every 10 minutes until it's ready. If it is below 20 degrees, add some hot water to the sink the gallon jugs are floating in. Pour 1 ounce of the stock developing solution into the graduated cylinder and then add 7 ounces of 20 degrees Celsius water to that. You are making a "working" solution by using a 1:7 chemical to water ratio. To recap, you made a stock solution of the developing chemical by using a 1:3 chemical concentrate to water ratio, and then mixed that stock solution with a 1:7 working chemical to water ratio.
13
With stopwatch in hand, pour the working developer into the hole in the top of the developing tank. Do this very quickly and start the stopwatch as soon as you've poured all the developer into the tank. Smack the developing tank on a counter a few times to dislodge any bubbles that might be clinging on to the film. Agitate the tank for 30 seconds. Do this by swirling the tank around. You are going to leave the film in the developer for as many minutes is appropriate for your film type (" target="_blank"> check the mas dev chart). Agitate the film for 5 seconds every 30 seconds. Agitation is very important. Do not neglect to agitate the developing tank. The developing chemicals become exhausted very shortly after coming in contact with the film. The agitation ensures that fresh chemicals are touching the film. However, this exhaustion of the chemicals is an important part of the process. Over-agitating can give negative results or positive results. It depends on the "look" you are going for. Too much agitation increases the contrast in the image but often you will damage the film and see sprocket marks if you have over agitated. If you want more contrast consider push processing.14
When the stopwatch has reached 10 seconds from the end of your time, start pouring the developer out of the top of the tank and into the sink drain. Do not take the lid off the developing tank.
YOU MIGHT ALSO LIKE


Share this Post
latest post
-
-
-
 History of advertising Photography October 10, 2016
 -
 Materials for pinhole camera October 7, 2016
 -
 Photojournalism photographers October 4, 2016
 -
 35mm nitrate film October 1, 2016
 -
 Photographic films September 28, 2016
 -
 One Colour Photographs September 25, 2016
 -
 Best compact digital camera for street photography September 22, 2016