 3 Use a tripod
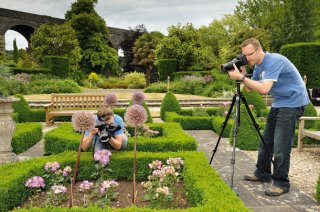
A good tripod is worth its weight in gold when photographing flowers – so pick the heaviest! Using a tripod slows you down and helps you think clearly about what you’re trying to achieve. You can fine-tune composition using a tripod and keep the point of focus exactly where you want it. The ideal type is a sturdy tripod with legs that can splay out so you can photograph close to the ground.
SEE MORE: 8 classic tripod mistakes every photographer makes (and how to avoid them)
4 Remote release
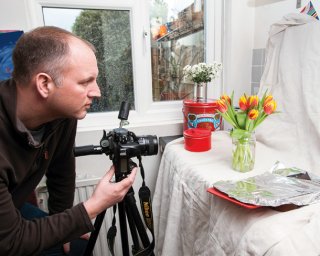
In order to produce flower pictures that are pin-sharp you need to reduce the risk of camera-shake. With your camera mounted on a tripod you should then attach a cable release. This enables you to fire the shutter without risking camera movement as a result of you pressing down on the shutter release button.
5 Go telephoto
In order to isolate a particular flower from its surroundings you should use a telephoto lens. A long lens when used with the camera set to a wide aperture can really throw the foreground and background out of focus so that the viewer’s attention is held where you want it. This is a great technique if you want to produce impressive photographs of individual plants.
SEE MORE: Best telephoto lens in the mid price range – 8 top options tested and rated
6 Wideangle lenses have their place
If you’d like to show an individual plant or a group of plants in their surroundings, then a wideangle lens is the tool for the job. Using one enables you to include the plants’ environment in a photograph so there’s more information available for the viewer. Depth of field is also increased, so your image can be sharp all the way from the foreground to the background.
 SEE MORE: What is maximum aperture – which lenses go widest (and why it matters)
7 Switch off autofocus
Depth of field is so narrow in close-up photography that precise focusing is critical, even with small apertures. To ensure your shots are sharp where you want, try switching to manual focus and doing it yourself. Changing focus alters the magnification of the subject, so set that first, then gently nudge the camera backwards and forwards to position the sweet spot of sharpness where you want it.
SEE MORE: A layman’s guide to depth of field – how to check and affect sharpness like a pro
8 Use Live View
When shooting close-ups with a macro lens, even at narrow apertures, you need to get your focusing spot on, as your depth of field is so limited that any slight inaccuracy will result in blurred shots. One way round this is to use Live View (if your camera has it) to focus in manually as accurately as possible – use Live View’s zoom facility and then, as above, move your camera back or forth by a few millimetres until the element that you want to be in focus is pin-sharp.
SEE MORE: 7 Dos and 3 absolute Don’ts of using Live View
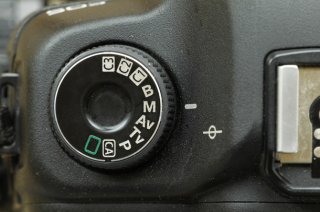
9 Shoot in manual
If you’d rather take control than let your camera decide everything for you, then shoot in manual mode. Shooting in manual enables you to choose the aperture and shutter combination that will give you the result you want. Checking your histograms will show you if you need to change a setting in order to produce a correctly exposed image. Bright flowers can fool your camera into underexposing, so shooting in manual and checking histograms can overcome this.
 SEE MORE: DIY Photography Hacks – how to make a light tent from 3-ring binders to diffuse sunlight
10 Digital camera settings for flower photography
- To achieve maximum image quality with minimum noise you should set your digital camera to the lowest ISO setting available, usually ISO 100 or 200.
- Set White Balance to Daylight to enable easy batch editing later.
- Use single shot drive mode, rather than continuous.
- Use wide apertures to emphasise a sharply focused subject against a blurred background.
SEE MORE: How to set up your autofocus for macro photography
11 Watch the weather
A forecast of wall-to-wall sunshine and cloudless blue skies isn’t ideal for flower photography. Direct sunlight can be harsh and unforgiving, resulting in images with too much contrast, burnt-out highlights and loss of detail in shadow areas. A bright but overcast day can be perfect – the light’s soft and diffuse and it’s much more flattering.
12 Use a reflector
A reflector is a cheap item of equipment but it can really help to boost your flower photographs to the next level. When positioned close to an individual plant it can be angled so that it directs light into shadow areas to reveal detail and to reduce contrast. It can also be used to shade plants from harsh, direct sunlight if it isn’t overcast.
SEE MORE: How to use a reflector to control natural light
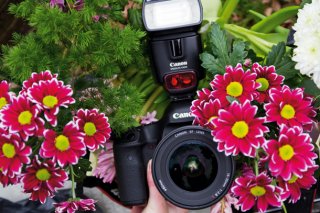
13 Flash flower photography
Used in moderation, flash can help you produce impressive images, but be careful not to overdo it. An off-camera flash can be used to provide a subtle burst of side-lighting (to model your subject), or back lighting (to provide a rim-light). Macro ringflashes are ideal for flower photography, as they produce an even and flattering light, eliminating the harsh shadows that are characteristic of standard flash units. Macro ringflashes are also ideal for picking out reflective details, such as grains of pollen or raindrops.

YOU MIGHT ALSO LIKE


Share this Post
latest post
-
-
-
 History of advertising Photography October 10, 2016
 -
 Materials for pinhole camera October 7, 2016
 -
 Photojournalism photographers October 4, 2016
 -
 35mm nitrate film October 1, 2016
 -
 Photographic films September 28, 2016
 -
 One Colour Photographs September 25, 2016
 -
 Best compact digital camera for street photography September 22, 2016