 Has Seasonal Affective Disorder got you particularly down about your night photography and low light pictures in general? Don’t worry, you’re not alone. It’s one of the more challenging subjects in photography. Learn how to take better photos at night with these 9 carefully selected night photography tips for beginners.
Whether you want to learn how to take photos of the night sky, find out how to paint with light or just want to know the right camera settings for night photography, these 9 tips will give you a solid foundation and get you ready to start tackling a number of popular low-light and night photography techniques.
Night Photography Tip 1: Get high quality night shots
If you want the best night shots you need to shoot in the best image quality, and that means RAW. By shooting in RAW your images will retain the most ‘information’, which gives you greater scope for enhancing your shots in Adobe Camera Raw and other raw-processing software.
SEE MORE: Free night photography cheat sheet: how to shoot popular low-light scenes
Night Photography Tip 2: Use a tripod for sharp pictures
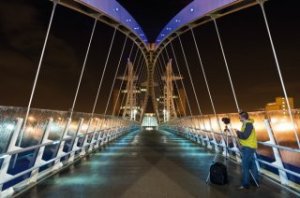
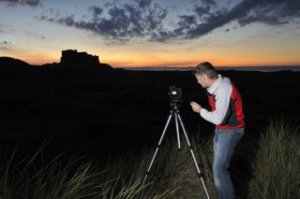
Shooting at night obviously means there will be less light and therefore slow shutter speeds, anywhere from 1-30 seconds – that’s way too slow to shoot hand-held. So you’ll need to attach your digital camera securely to a tripod if you want sharp results.
 SEE MORE: 8 tripod mistakes every photographer makes (and how to get it right)
Night Photography Tip 3: Pick your night photography locations in advance
Before you venture out into the night, it will pay dividends and save you valuable time later if you plan ahead.
Pick good locations beforehand by scouting out the best spots in your local town to find the most interesting lights and architecture, or if you’re looking to shoot traffic light trails, check which roads are busiest, when is the best time for traffic, and which is the best (and safest) position to take photos from.
Night Photography Tip 4: Use the lens sweet spot
Use the ‘sweet spot’ range of apertures for your lenses – this is usually between f/8 and f/16, but take test shots to find out.
Even pro-level lenses don’t produce the best results when used at their maximum and minimum apertures. By using apertures in the middle of the available range you’ll increase your chances of capturing the sharpest shots with your lens.
SEE MORE: How to find your lens’ sweet spot
Night Photography Tip 5: Night photography settings
To take control of your exposures it’s best to shoot in Manual mode so you can choose the best narrow aperture and slow shutter speed for night photography.
 Begin by composing and focusing your shot, set a narrow aperture around f/16, then dial in the right shutter speed until the Exposure Level Mark is in the middle of the Exposure Level Indicator.
Take some shots and review them on your LCD. Remember this is what your camera thinks is the best exposure, but if your shots are looking too bright, underexpose by 1-2 stops so that they actually look dark!
SEE MORE: Best camera settings for night cityscapes and traffic trails
Night Photography Tip 6: How to get a ‘starburst’ effect on street lights
Using a narrow aperture (around f/16) will not only ensure a deeper depth of field, so your shots are sharp from foreground to background, but will also make street lights ‘sparkle’ in your scenes to give your pictures an added magical effect. See the shot below…
Night Photography Tip 7: Composition at night
Carefully study the scene before you start taking photos. Are parts of the scene in darkness? Do areas of the shot become more interesting, brightly lit or colourful as it gets darker? If so, don’t be afraid to zoom in on the most photogenic areas. Zoom in with your wide-angle zoom lens or ‘zoom with your feet’ – just move closer to your subject…
SEE MORE: 10 rules of photo composition (and why they work)
Night Photography Tip 8: Use Mirror Lock-up
The slightest movement can create unwanted camera shake, and this even includes the mirror moving up and down inside your digital SLR. You can quickly enable Mirror Lock-up (look for it in your camera menu’s Custom Functions menu) to get around this potential pitfall.
Night Photography Tip 9: Don’t touch your camera!
When taking long exposures at night, even touching your camera to press the shutter button can create enough movement to leave you with blurred results. Use your digital camera’s built-in self-timer to trigger the shutter after you’ve pressed the button to avoid any problems. For shots that rely on accurate timing, use a remote release instead.
YOU MIGHT ALSO LIKE


